Ctrlr Config Files
Controller specific config files are designed so that you can configure the abundance of controllers available on the market to work with MAME. If you consider that you can get up to 14 buttons on a controller, multiple sticks and dpads, you can configure each one to do something in MAME. You can even make specific controller config files that work exclusively on individual games or systems. MAME config files use XML so are not for the beginner but they are incredibly useful if you have special controllers that you want to use.
The Easy Way...
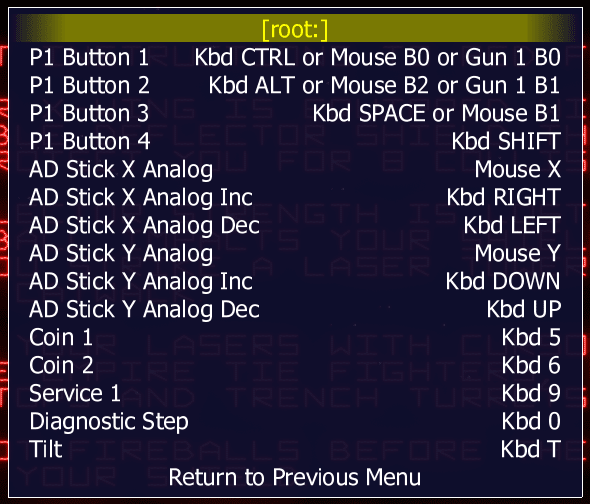
Here's a little shortcut for all of you not brave enough to read the whole section. To save time you can load the game you want to remap into MAME, remap the controls in the MAME config menus (press Tab and go to Input (this Machine)). You'll see something like this...
To change a key, highlight the control you want to change with the arrow key, press Enter and then press the key/move the axis on the controller you want to use for the control.
Exit the machine and MAME will save a config file in the cfg folder in your MAME folder. What you can do is open the config file (named gamename.cfg) and copy / paste the changed keys into your controller config file. This saves trying to work out the names for your controllers function and writing all those lines of code. (Note: make sure that you delete any <counter> and <mixer> commands that may be copied)
The Hard Way...
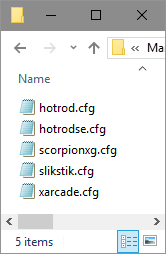
Open up the C:\Mame\ctrlr folder. It will look something like this...
You will see the XML files for the controllers which are saved with a .cfg extension . Now a .cfg file doesn't normally have a default application to open it and if you have MS Outlook it'll default to that (which is a pain!). To edit the file you'll need to open it in a text editor such as Notepad. To associate it with a text editor, simply right click it and select the "Open With..." option. Use Notepad if you don't have your own prefered editor. You can now double click the .cfg file and it will open. Here is an example of a controller config file...
You will see that it's quite complex at first glance but XML is very structured so once you've worked out the structure its as easy as any other ini file.
OK... the basic structure. First of all the config files are read by MAME from top to bottom so every time you add a system to the config, it overrides the other previous ones. For example a config file with some default commands, some m72 driver commands and say R-Type specific commands would need to be set up with default.cfg first, m72.cfg second and r-type.cfg last as earlier commands will get overwritten as MAME loads them. Confused? You will be... To sum up, the sequence is... default > driver > system. That's it!
Here is a simple controller file....
<MAMEconfig version="10">
<system name="default">
<input>
<port type="START1">
<newseq type="standard">KEYCODE_1 OR J1_Button_9</newseq>
</port>
</input>
</system>
</MAMEconfig>
What it does is use the start button on my controller as the player 1 start button. All you have to do is save it as mycontroller.cfg in the C:\Mame\ctrlr folder and you can use it.
Let's have another look at the controller config file above and I'll explain a bit more...
<MAMEconfig version="10">
<system name="default">
<input>
<port type="START1">
<newseq type="standard">KEYCODE_1 OR J1_Button_9
</newseq>
</port>
</input>
</system>
</MAMEconfig>
If you look you can see that for every command it has a start and an end. For example <input> is always followed later by </input> to close the command (note the backslash / on the close). This is fairly standard format for programming and html too. The trick is to use a single tab for every opening command and a tab back for every closing command as this helps you keep track of the commands.
The first line <MAMEconfig version="10"> just tells MAME that this is a config file.
The second line <system name="default"> sets which game system or game the config file will affect. Default affects all games but you can use driver or system names too.
The third line <input> tells MAME that an input command will be changed.
The fourth line <port type="START1"> sets the command that will be changed. You can see a list of commands from the input menus in MAME.
The fifth line <newseq type="standard">KEYCODE_1 OR J1_Button_9 gives the key press or controller movement to be used for the previous lines command.
The sixth line </newseq> closes the newseq command. Normally you'd put it at the end of a newseq line but I moved it down to help explain it.
The seventh line </port> closes the port command so that any more lines wont affect that command.
The eighth line </input> closes the input command for the system stated above it.
The ninth line </system> closes the named system off so you can add another system to the cfg file if you want to.
The tenth and final line is </MAMEconfig> . This is always the final line as MAME wont read any further when it reads this.
There is another command <remap> which is used like this...
<remap origcode="KEYCODE_UP" newcode="KEYCODE_8_PAD" />
From what I can make out it will take the command in origcode and use it for the command used in the newcode too so one change will affect two codes (Though this might be completely wrong!)
Thats about it for XML based cfg files. To find out the names for commands and movements then look in the input menus in MAME.
Using Your Config.
Unfortunately MAME will not allow you to select controller types from it's menus so you have to add the config file to the command line option or include it in an ini file. To use your config from the command line, you will need to add the -ctrlr option to your command line e.g.
mame64 puckman -ctrlr xbox
This will load Pac Man with a controller config file called xbox. If you want to use your config as the default keymap for all or specific systems you can add it to the mame.ini or a custom ini file by changing/adding the line ctrlr <ctrlr file> in the # CORE INPUT OPTIONS section. For example...
ctrlr xbox
You can find more details on creating/editing the mame.ini and custom ini files in the menu.

