Hash Files
Hash files are where MAME stores it's software lists. Software lists are used by MAME to run recognised software on a machine Each file contains a list of software images that are supported by each machine and information about what media it is on. Though the listed software may be supported by the machine, there is no guarantee that it will work if the driver is incomplete. MAME will warn you if the software isn't fully supported when you run it.
Hash files use XML and so are not for the beginner but are incredibly useful if you want to add your own software to a driver and have it listed on the MAME user interface.
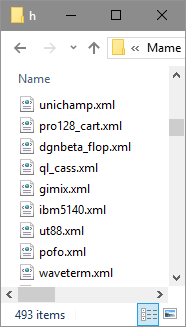
Open up the C:\Mame\hash folder. It will look something like this...
Normally a .xml file doesn't normally have a default application to open it. To edit the file you'll need to open it in a text editor such as Notepad. To associate it with a text editor, simply right click it and select the "Open With..." option. Use Notepad if you don't have your own prefered editor. You can now double click the xml file and it will open. Here is an example of a hash file for the Sinclair QL...
XML is quite complex at first glance but is very logical once you've worked out how it is structured. The basic rule is... to open a command use <> and to close a command use </>. All opened commands need to be closed.
Here is a simplified hash file....
<softwarelist name="ql_flop" description="Sinclair QL diskettes">
<software name="quill">
<description>Quill</description>
<year>1984</year>
<publisher>Psion</publisher>
<part name="flop1" interface="floppy_3_5">
<dataarea name="flop" size="737280">
<rom name="qlquill.img" size="737280" crc="ac41ceca" sha1="4f855a10ce9c5bdd3b36cd9b9b02540c123b0932" offset="0" />
</dataarea>
</part>
</software>
</ softwarelist>
I'll break it down into it's component parts below but as you see, every command that was opened, was closed either on the same line or further down the list.
<softwarelist name="ql_flop" description="Sinclair QL diskettes">
<software name="quill">
<description>Quill</description>
<year>1984</year>
<publisher>Psion</publisher>
<part name="flop1" interface="floppy_3_5"
<dataarea name="flop" size="737280">
<rom name="qlquill.img" size="737280" crc="ac41ceca" sha1="4f855a10ce9c5bdd3b36cd9b9b02540c123b0932" offset="0" />
</dataarea>
</part>
</software>
</softwarelist>
If you look you can see that for every command it has a start and an end. For example <input> is always followed later by </input> to close the command (note the backslash / on the close). This is fairly standard format for programming and html too. The trick is to use a single tab for every opening command and a tab back for every closing command as this helps you keep track of the commands.
The first line <softwarelist name="ql_flop" description="Sinclair QL diskettes"> just tells MAME that this is a software list. name= is the short driver name and description= is the full system name.
The second line <software name="quill"> is the short name for the software image.
The third line <description>Quill</description> is the full name of the software image.
The fourth line <year>1984</year> is the year that the software was released.
The fifth line <publisher>Psion</publisher> is the publisher of the software.
The sixth line <part name="flop1" interface="floppy_3_5" give information of the media used to for the software. name= is the media type and interface= is the hardware device required to be run in the system to read the software image.
The seventh line <dataarea name="flop" size="737280"> gives MAME information about the media image.
The eighth line <rom name="qlquill.img" size="737280" crc="ac41ceca" sha1="4f855a10ce9c5bdd3b36cd9b9b02540c123b0932" offset="0" /> gives the name of the image file in the zipped software. It also contains the image size and hash check numbers that are used in MAME to confirm that this is a supported image.
The ninth line </dataarea> closes the dataarea command for the system stated above it.
The tenth line </part> closes the part command for the system stated above it.
The eleventh line </software> closes the software command for the system stated above it.
The twelfth and final line is </softwarelist> . This is always the final line as MAME wont read any further when it reads this.
Thats about it for XML based hash files. To be honest, you should only mess around with them if you're confident you know what your doing.
Creating / Adding to a hash file.
If you want to create a new software list then the easiest way would be to copy an existing list and amend the details inside. All you have to remember is to call it the same name as the system you want to use it with. This name can be found by looking at the system rom file or the information page in the MAME user interface.
To add your own software to an existing software list, the simplest way would be to cut and paste an existing section and amend the entries. The most important parts are the CRC and SHA hash check. These numbers are unique to each software image and helps MAME confirm that the image is supported and error free. If you have a new software image then you will need to get this information either via whatever source you got the image from or from a program which will analyse the image file. The 7Zip program has this facility built in and adds a useful option onto the windows context menu.
Once you have entered all the relevant information and saved the hash file, you can run your software from the internal menu or from the command line. A command line example would be...
mame64 snes -cart myimage
As the software image is in a soft list you don't even need the -cart command.
